
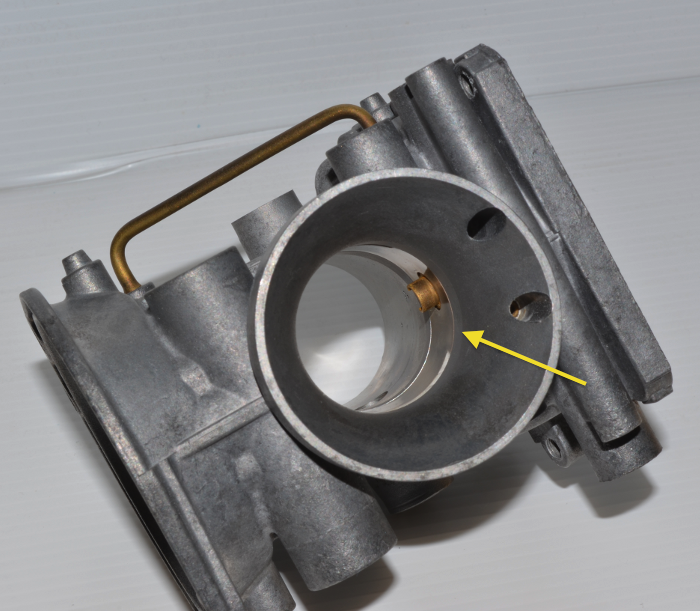
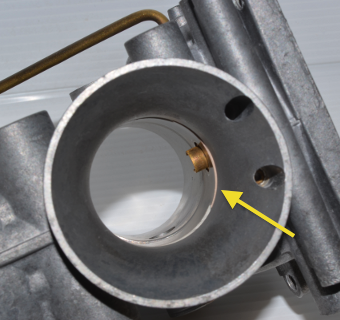
This is a very critical section of the BDST carburettor. The downdraft design necessitates a very short contact area where the needle jet, or emulsion tube, fits into the carb body. Sealing the needle jet in this case is performed by two seals. One is the slide housing o-ring and the other is the jet housing o-ring. They are compressed against each other as the needle jet is tightened down against the jet housing. These seals should be considered a service item as they are a critical part that will affect the engine performance. As such, they should be routinely checked. The images shown here may not exactly match the version of the BDST carburettor fitted to your motorcycle. However, the significant assembly details are shared across the models. Ducati and Suzuki owners note that the slide housing o-ring is not shown in the respective parts books.
 1/ Before beginning the assembly, trial fit the slide housing. without an o-ring, into the carb body to take note of how well the slide housing aligns with the carburettor throat. |
|
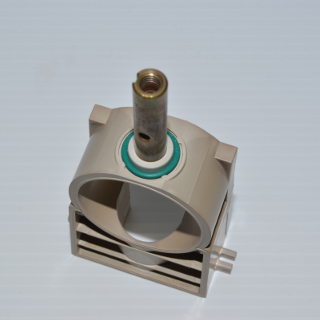
2/ Fit the slide housing o-ring (OR-018 was OR-003) to the underside of the slide housing. |
3/ Now, with the o-ring fitted, the slide housing is no longer sitting flush. This is because of the thickness of the o-ring which needs to be compressed. These parts have been designed by Mikuni to allow for the correct amount of compression to be applied to the o-ring, and it is very important that the correct size and thickness of o-ring is used. Choosing a 10 x 1mm, or 10 x 1.5, the common metric sizes, because it is "close enough" is incorrect and will result in an inadequate seal or mis-aligned slide housing. |

4/ Because the recess for the seal is quite shallow, you may have difficulty getting the seal to remain in the groove when fitting. Therefore we recommend to use Permatex #85420 fuel resistant gasket cement. Apply the smallest amount needed to a few spots on the jet housing side of the seal. ONLY ON ONE SIDE |
5/ Fit the jet housing seal (JH-001) to the jet housing. |
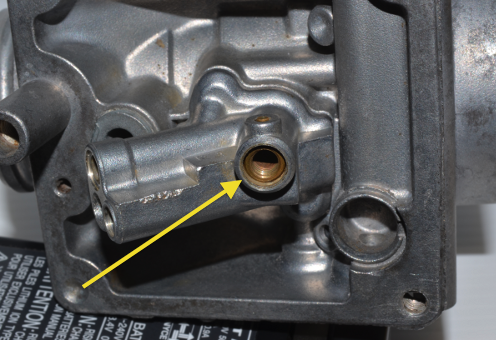 6/ Fit the jet housing over the needle jet and against the body. The needle jet sits well below the lip of the jet housing. This means that the brass screw and washer that are used to secure it cannot be be firmly tightened. As the screw is tightened it compresses both the slide housing o-ring and the jet housing seal. |
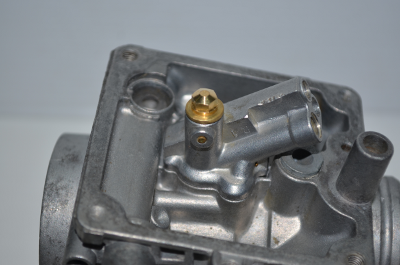
7/ Brass screw and washer. Check that the surfaces of the washer are smooth and clean. |
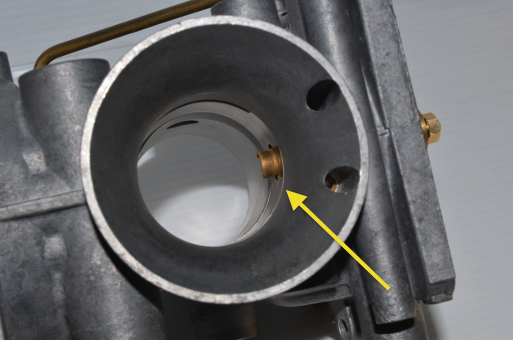 8/ Gently tighten the needle jet screw (6mm hex) until the slide housing is flush with the throat and the screw feels snug. |
|